SwiftUI v/s Jetpack Compose
The epic showdown of the mobile app development arena! Get ready to compare the full insight of these frameworks.
Disclaimer!!
The following comparison reflects solely my personal opinions . It is not intended to criticize any programming languages or their respective communities.
The Ultimate Battle Round
-- Language
-- UI Components
-- Local Storage
-- Network/HTTP Request
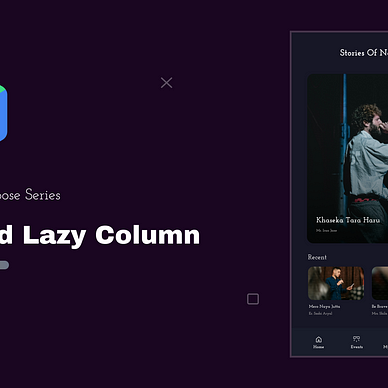
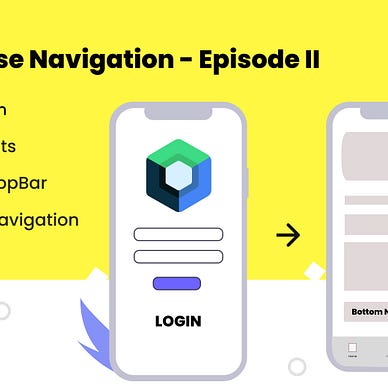
-- Navigation
-- Database/Offline Storage
-- The IDE
-- Community Support
-- Learning CurveNative apps are great, aren’t they? They just feel way more cool, smoother, and more natural.
I’ve been into Native Android development for about 7 years now, working on all sorts of applications. A few years back, I got a chance to try out iOS development. Venturing into iOS development was exciting but the transition from Android’s (Java) familiar domain to the iOS (Swift) ecosystem felt like exploring a new language. Concepts like ViewControllers and AutoLayout presented fresh challenges to me.
As the years progressed, both Android and iOS underwent significant transformations. Android developers were introduced to Jetpack Compose, and iOS developers to UIKit and SwiftUI.
Initially, adapting Jetpack Compose has its own set of challenges, like in UIKit/SwiftUI. However, as they matured, their benefits became intuitive and enjoyable. The evolution of both platforms has been fascinating to witness.
Oh, I miss the days of wrestling with complex XML Layout structures. 💀
With each iteration, app development becomes more accessible and enjoyable.
Recently, I created two sample apps, one using iOS SwiftUI — Dragonfly & the other using Android Jetpack Compose — Firefly.
Both applications share identical features and nearly identical folder structures, following the MVVM pattern. They both have a fundamental feature: an Authentication Flow (Login to Bottom Navigation Screen).
The core components used to build these apps are as follows:
Android — Firefly
- UI Components — Jetpack Compose
- HTTP Request — Retrofit
- Local Storage — Shared Preference
- Database — Room
- Dependency Injection — Hilt
- Navigation — Compose Navigation Component
The step by step guide of Firefly Android App is here.
IOS — Dragonfly
- UI Components — SwiftUI
- HTTP Request — Alamofire
- Local Storage — User Defaults
- Database — Realm
- Dependency Injection — Manual/Singleton Class
- Navigation — Navigation stack with custom enum-based
While the code is functional, there’s always room for improvement. Feedback & suggestions are welcome.
The Language ⚔️
Swift & Kotlin are quite similar language. Despite their origins, both languages have undergone rapid evolution, driven by the evolving demands of mobile app development.
Variables
Variables in both Swift and Kotlin are declared using the var keyword.
// swift
let pi = 3.14
var myVariableInSwift: Int = 10
var nullableString: String? = nil

// kotlin
val pi = 3.14
var myVariableInKotlin: Int = 10
var nullableString: String? = null
Loops
For loops, Swift uses the for-in construct, while Kotlin utilizes ranges.
// swift
for i in 0..<5 {
    print(i)
}
for i in stride(from: 0, to: 10, by: 2) {
    print(i)
}
// for each loops
for number in numbers {
    print("\(number) ")
}
numbers.forEach { number in
    print("\(number) ")
}

// kotlin
for (i in 0 until 5) {
    println(i)
}
for (i in 1..5) {
    println(i)
}
// for each loops
 for (number in numbers) {
        println(number)
 }
 numbers.forEach { number ->
        println(number)
 }
Data Structures
In Kotlin and Swift, there are several available data structures that developers can use to organize, store, and manipulate data.
// swift
var myArray: [Int] = [2, 4, 6]
let person: [String: Any] = ["device": "iOS", "version": 17, "name": "Ventura]

// kotlin
var myList: MutableList<Int> = mutableListOf(2, 4, 6)
var person = mapOf("device" to "Android", "version" to 34, "name" to "Pie")
Objects
In both Kotlin and Swift, different structures can be used to represent objects that hold information like Struct, Class & Data Class.
// swift
struct Book {
    let title: String
    let author: String
    let pageCount: Int
}
let book = Book(title: "Learn Swift", author: "N.P", pageCount: 10)

// kotlin
data class Book(val title: String, val author: String, val pageCount: Int)
val book = Book("Learn Kotlin, "N.P.", 12)
Interfaces
Interfaces are known as protocol in Swift and interface in Kotlin.
// swift
protocol Animal {
    func makeSound()
}

class Dog: Animal {
    func makeSound() {
        print("Woof!")
    }
}

let dog = Dog()
dog.makeSound() // Woof!
// kotlin
interface Animal {
fun makeSound()
}
class Dog : Animal {
override fun makeSound() {
println("Woof!")
}
}
fun main() {
val dog = Dog()
dog.makeSound() // Woof!
}The UI Component 📱
Let’s explore the fundamental components of SwiftUI and Jetpack Compose. We will create the below Card using these frameworks.

In, SwiftUI we can create this simple card with the following code
struct ProductRowView: View {
    let product: ProductEntity
    let onItemClick: (String) -> Void

    var body: some View {

        VStack {
            // KFImage -> KingFisher Image Loading Library
            KFImage(URL(string: product.thumbnail)!)
                .placeholder {
                    Image(AppImage.placeholder.rawValue)
                        .aspectRatio(contentMode: .fill)
                        .frame(height: 200)
                        .clipped()
                }.background(Color.white)
                 .aspectRatio(contentMode: .fit)
                 .frame(
                    width: abs(UIScreen.main.bounds.width - 30),
                    height: 200)
                 .clipped()

            VStack(alignment: .leading) {
                Text(product.title)
                    .font(.title)
                    .fontWeight(.bold)
                    .foregroundColor(.primary)
                    .padding(EdgeInsets(
                        top: 4,
                        leading: 0,
                        bottom: 4,
                        trailing: 0))

                Text(product.descriptionText)
                    .font(.body)
                    .foregroundColor(.secondary)
                    .lineLimit(2)
                    .padding(EdgeInsets(
                        top: 4,
                        leading: 0,
                        bottom: 4,
                        trailing: 0))

            }.padding()

        }
        .frame(width:  UIScreen.main.bounds.width - 30)
        .background(Color.white)
        .cornerRadius(10)
        .shadow(radius: 1)
        .foregroundColor(Color.gray)
        .onTapGesture {
            onItemClick(product.title)
        }

    }
}
Some layout groups,
- Vertical Arrangement → VStack — Column
- Horizontal Arrangement → HStack — Row
- Overlapping Arrangement → ZStack — Box
In, Jetpack Compose we can create this same card with the following code:
@Composable
fun ProductItem(
      productEntity: ProductEntity,
      onProductItemClick: (String) -> Unit) {

    Card(
        modifier = Modifier
            .padding(MaterialTheme.dimens.medium)
            .shadow(
                elevation = 5.dp,
                spotColor = MaterialTheme.colorScheme.secondaryContainer,
                shape = MaterialTheme.shapes.medium
            )
            .clickable {
                onProductItemClick(productEntity.id.toString())
            },
        shape = MaterialTheme.shapes.medium
    ) {
        Column(
            Modifier
                .fillMaxWidth(),
        ) {
          // AsyncImage -> Coil Image Loading Library
            AsyncImage(
                model = productEntity.thumbnail,
                contentDescription = productEntity.title,
                modifier = Modifier
                    .background(MaterialTheme.colorScheme.secondaryContainer)
                    .fillMaxWidth()
                    .height(150.dp),
                contentScale = ContentScale.Crop,
            )

            Column(
                Modifier
                    .padding(10.dp),
            ) {
                Text(
                    text = productEntity.category.uppercase(),
                    style = appTypography.labelSmall,
                    color = MaterialTheme.colorScheme.onSecondaryContainer,
                    modifier = Modifier.padding(8.dp)
                )

                Text(
                    text = productEntity.title,
                    style = appTypography.titleLarge,
                    maxLines = 2,
                    color = MaterialTheme.colorScheme.onTertiaryContainer,
                    modifier = Modifier.padding(8.dp)
                )

                Text(
                    text = productEntity.description,
                    style = appTypography.bodySmall,
                    maxLines = 3,
                    color = MaterialTheme.colorScheme.onTertiaryContainer,
                    modifier = Modifier.padding(8.dp)
                )

                Spacer(modifier = Modifier.height(8.dp))

            }
        }
    }

}
I think you got the concept of UI elements, you can modify UI with different modifiers available in both of these frameworks.
State Management 🐬
There are various ways to manage the state in these frameworks, each with its own advantages and use cases.
In SwiftUI,
@State — is a property wrapper provided by SwiftUI to manage the state of a view. It is used for a simple, local state that is owned by a single view.
@Binding — is used to create a two-way binding between a parent view and its child view. It allows the child view to modify a value owned by the parent view.
@ObservableObject and @ObservedObject — It is a protocol used to define a model object that can be observed for changes.
struct TextFieldExample: View {
    @State private var text: String = ""

    var body: some View {
        VStack {
            TextField("Enter text", text: $text)
                .textFieldStyle(RoundedBorderTextFieldStyle())
                .padding(16)

            Text("Text entered: \(text)")
        }
    }
}

// observableobject example
class UserViewModel: ObservableObject {
    @Published var username: String = ""
}

struct ContentView: View {
    @ObservedObject var viewModel = UserViewModel()
    var body: some View {
        TextField("Enter username", text: $viewModel.username)
    }
}
In Jetpack Compose, Some of the components to manage states are:
remember {} — The remember function to preserve the state across recompositions (ui update process).
Coroutines, LiveData, and StateFlow— By combining these we can make a super effective asynchronous stream flow and state management.
@Composable
fun TextFieldExample() {
    var textState by remember { mutableStateOf(TextFieldValue()) }

    Column(
        horizontalAlignment = Alignment.CenterHorizontally
    ) {
        BasicTextField(
            value = textState,
            onValueChange = { newValue ->
                textState = newValue
            },
            textStyle = TextStyle(fontSize = 20.sp),
            modifier = Modifier.padding(16.dp)
        )
        Text(text = "Text entered: ${textState.text}")
    }
}
The Local Storage 💾
In iOS App, local app storage can be managed using UserDefaults or CoreData. It’s like SharedPreference/DataStore in Android.
Here’s a simple example of UserDefaults:
import Foundation

enum AppStorageKeys : String{
    case isLoggedIn,userId, userToken
}

final class AppStorageManager {

    static let shared = AppStorageManager()
    private init() {}

    func getValue<T>(_ key: AppStorageKeys, defaultValue: T) -> T {
        UserDefaults.standard.object(forKey: key.rawValue) as? T ?? defaultValue
    }
    func setValue<T>(_ value: T, forKey key: AppStorageKeys) {
        UserDefaults.standard.set(value, forKey: key.rawValue)
    }

    // LoggedInUser Getter Setter
    func getLoggedInUserId() -> String {
        getValue(AppStorageKeys.userId, defaultValue: "none")
    }
    func setLoggedInUserId(_ userId: String) {
        setValue(userId, forKey: AppStorageKeys.userId)
    }

}
In Android, Let's see the example of using SharedPreference.
class PreferenceManager private constructor(context: Context) {
    private val sharedPreferences: SharedPreferences = context.getSharedPreferences(
        "my_preferences",
        Context.MODE_PRIVATE
    )

    enum class Key {
        IS_LOGGED_IN,
        USER_TOKEN
    }

    companion object {
        @Volatile
        private var instance: PreferenceManager? = null

        fun getInstance(context: Context): PreferenceManager {
            return instance ?: synchronized(this) {
                instance ?: PreferenceManager(context).also { instance = it }
            }
        }
    }

    fun setIsLoggedIn(isLoggedIn: Boolean) {
        sharedPreferences.edit().putBoolean(Key.IS_LOGGED_IN.name, isLoggedIn).apply()
    }

    fun isLoggedIn(): Boolean {
        return sharedPreferences.getBoolean(Key.IS_LOGGED_IN.name, false)
    }

}
// Using it as
PreferenceManager.getInstance(context).setIsLoggedIn(true)
val isLoggedIn = PreferenceManager.getInstance(context).isLoggedIn()
In the project repo, you will find all these codes with proper injection.
The Network/HTTP Request 🌐
For networking tasks, iOS developers can use URLSession, Alamofire, etc.., while Android developers may opt for Retrofit or Ktor, etc.
Below is an example illustrating a network request using Alamofire. I’ve adopted a generic approach with Combine for asynchronous publisher-subscriber handling of the network request.
import Alamofire
import Combine

class NetworkManager {
    static let shared = NetworkManager()
    private init() {}

    func fetchData<T: Decodable>(url: String,
                                     method: HTTPMethod = .get,
                                     headers: HTTPHeaders? = nil,
                                     parameters: Parameters? = nil,
                                     responseType: T.Type) -> AnyPublisher<T, Error> {

            let publisher = Future<T, Error> { promise in
                AF.request(url,
                           method: method,
                           parameters: parameters,
                           headers: headers)
                    .validate()
                    .responseDecodable(of: T.self) { response in
                        switch response.result {
                        case .success(let value):
                            promise(.success(value))
                        case .failure(let error):
                            promise(.failure(error))
                        }
                    }
            }
            .eraseToAnyPublisher()

            return publisher
        }
}
// Implement in Repository as
class AuthRepository{

   func login(username: String, password: String) -> AnyPublisher<UserResponse, Error> {
       let loginUrl = EndPoints.loginUrl
       let parameters: Parameters = [
           "username": username,
           "password": password
       ]
       return NetworkManager
                  .shared
                  .fetchData(url: loginUrl,
                             method: .post,
                             parameters: parameters,
                             responseType: UserResponse.self)
     }
}

class LoginViewModel: ObservableObject{

    private let authRepository: AuthRepository
    private var cancellables = Set<AnyCancellable>()

    init(authRepository: AuthRepository = AuthRepository()) {
        self.authRepository = authRepository
    }

    func login(with loginState: LoginViewState) {
        authRepository.login(username: loginState.username, password: loginState.password)
            .sink(receiveCompletion: { [weak self] completion in
                switch completion {
                case .finished:
                    break
                case .failure(let error):
                    self?.error = error
                }
            }, receiveValue: { [weak self] user in
                // Success !!
                AppStorageManager.shared.setUserLoggedIn(true)
            })
            .store(in: &cancellables)
    }

}
Here’s an example demonstrating the usage of Retrofit. With Retrofit, specific methods need to be created to handle network requests.
data class LoginResponse(val token: String)

// LoginApi.kt
interface ApiService {
    @FormUrlEncoded
    @POST("login") // Specify the login endpoint path
    suspend fun login(
        @Field("username") username: String,
        @Field("password") password: String
    ): LoginResponse // Define a suspend function to perform login
}
// User Repository
class UserRepository {
    private val apiService = RetrofitClient.create()

    suspend fun login(username: String, password: String): Result<LoginResponse> = withContext(Dispatchers.IO) {
        try {
            val response = apiService.login(username, password)
            Result.Success(response)
        } catch (e: Exception) {
            Result.Error(e)
        }
    }
}
// LoginViewModel
class LoginViewModel : ViewModel() {
    private val userRepository = UserRepository()

    fun login(username: String, password: String) {
        viewModelScope.launch {
            val result = userRepository.login(username, password)
            if (result is Result.Success) {
                val token = result.data.token
                //successful login
            } else if (result is Result.Error) {
                val exception = result.exception
                // failure
            }
        }
    }
}
// use livedata/flow to pass/observe data to views
The Navigation 🧭
In iOS, navigation is controlled using the NavigationStack. There is no Nav Controller to control the screen like in Jetpack Compose.
We have to implement it manually to manage screen push and pop operations. To simplify this process, let’s create an app navigator class to handle these tasks automatically. It’s a simple NavController for SwiftUI.
// Contains the possible destinations in our Router
enum Route: Hashable {
    case login
    case main
    case product(String)
}

class AppNavigator : ObservableObject {

    @Published var routes: [Route] = []
    let appStorage = AppStorageManager.shared

    var isLoggedIn: Bool {
        appStorage.isUserLoggedIn()
    }

    @ViewBuilder
    func rootScreen() -> some View{
        if(isLoggedIn){
            LoginScreen()
        }else{
            MainScreen()
        }
    }

// MARK: - Builds views for screen
    @ViewBuilder
    func getAppScreen(_ route: Route) -> some View {
        switch route {
        case .login:
            LoginScreen()
        case .main:
            MainScreen()
        case .product(let productId):
            ProductScreen(productId: productId)
        }
    }

// MARK: - Used by views to navigate to another view

    func navigateTo(route: Route) {
        routes.append(route)
    }
    // Back to navigation
    func navigateUp() {
        routes.removeLast()
    }
    func popToRoot() {
        routes.removeLast(routes.count)
    }
}

// Now, we can use this object as EnvironmentObject
// Or create custom protocol callbacks to handle these without injecting.
In Android, the Navigation Component is the preferred method for managing a stack of screens. Here, the NavController plays a vital role in all navigation operations, while the Graph efficiently manages stack/ multiple navigation stacks.
A step-by-step guide to implement Navigation in Jetpack Compose is here.
// Define an enum class for navigation destinations
enum class NavigationDestinations(val route: String) {
    LOGIN_SCREEN("login"),
    HOME_SCREEN("home")
}

@Composable
fun AppNavigation() {
    // Create a NavController
    val navController = rememberNavController()

    // Root container -
    NavHost(navController = navController,
            startDestination = NavigationDestinations.LOGIN_SCREEN.route) {
        // Define destinations
        composable(NavigationDestinations.LOGIN_SCREEN.route) {
            LoginScreen { destination -> navController.navigate(destination.route) }
        }
        composable(NavigationDestinations.HOME_SCREEN.route) {
            HomeScreen { destination -> navController.navigate(destination.route) }
        }
    }
}

@Composable
fun LoginScreen(onNavigate: (NavigationDestinations) -> Unit) {
    Button(onClick = {
        onNavigate(NavigationDestinations.HOME_SCREEN)
    }) {
        Text("Go to Home Screen")
    }
}

@Composable
fun HomeScreen(onNavigate: (NavigationDestinations) -> Unit) {
    Button(onClick = {
        onNavigate(NavigationDestinations.LOGIN_SCREEN)
    }) {
        Text("Go back to Login Screen")
    }
}
The Database — Offline Storage 🗃️
In SwiftUI and Jetpack Compose, developers use various databases to persist and manage application data like CoreData, Realm, etc. Let’s see a simple implementation of Realm in iOS, Realm is available in Android too.
Realm is a cross-platform database solution that is commonly used in SwiftUI applications. It provides an easy-to-use, object-oriented database interface and supports reactive programming paradigms.
class ProductEntity: Object, Identifiable {
    @objc dynamic var id: String = UUID().uuidString
    @objc dynamic var title: String = ""
    @objc dynamic var brand: String = ""
    @objc dynamic var category: String = ""
    @objc dynamic var thumbnail: String = ""
    let images = List<String>()

    override static func primaryKey() -> String? {
        return "id"
    }
}

// Directly Observing table data in View
struct HomeScreen: View {

    @StateObject private var viewModel = HomeViewModel()
    @EnvironmentObject private var appNavigator: AppNavigator
    @ObservedResults(ProductEntity.self) var productEntities

    var body: some View {

        List(productEntities) { product in
            ProductRowView(product: product){ productId in
                appNavigator.navigateTo(route: .product(productId))
            }.listRowSeparator(.hidden)
        }
        .listStyle(.inset)
    }
}
In Android,
SQLDelight — SQLDelight is a multiplatform SQL database library developed by Square, designed to generate typesafe Kotlin APIs based on your SQL statements. It supports Jetpack Compose on Android and integrates well with Kotlin Multiplatform projects.
Room — It is Google’s SQLite object mapping library for Android, designed to simplify database interactions and provide type safety. Let’s see a simple implementation of Room in Jetpack Compose.
// Product Table or Entity
@Entity(tableName = "products")
data class ProductEntity(
    @PrimaryKey val id: Int,
    val name: String,
    val price: Double
)

// Contains methods to interact with the database.
@Dao
interface ProductDao {
    @Query("SELECT * FROM products")
    fun getAllProducts(): List<ProductEntity>

    @Insert
    fun insertProduct(product: ProductEntity)
}

// database method to retrieve DAO instances.
@Database(entities = [ProductEntity::class], version = 1)
abstract class AppDatabase : RoomDatabase() {
    abstract fun productDao(): ProductDao
}

// Database Module
@Provides
@Singleton
fun provideAppDatabase(application: Application): AppDatabase {
        return Room
            .databaseBuilder(
                application,
                AppDatabase::class.java,
                "x_firefly_x"
            )
            .fallbackToDestructiveMigration()
            .build()
}
// we can create a repository and use it in viewmodel
// Then pass it to view by observing the state more at -> github project link.
The IDE 👩🏻💻
The Integrated Development Environments (IDEs) Android Studio and Xcode both offer robust features for app development.
Xcode offers a more straightforward approach to app configuration, including setting names, launch screens, and orientations. It is more beginner-friendly in this aspect, requiring less specialized knowledge.
Xcode have fewer IDE bugs compared to Android Studio.
Android Studio is generally perceived as more user-friendly compared to Xcode. Git integration and Local /Remote Git history are better managed in Android Studio.
The simulators in both Android Studio and Xcode consume significant memory and may strain system resources. However, Android Studio provides more control over simulator configuration, such as network and location permission settings, directly within the IDE.
Overall, Android Studio stands out for its developer-friendly environment, extensive plugin support, and integrated assistance features. I hope Xcode will improve for better in the future.
The Community Supports
In the fast-paced world of app-making, community support is everything.
In Android community, developers eagerly welcomed Jetpack Compose, even during its early stages. Its integration with Kotlin, a familiar language, made the transition smooth. Despite initial challenges, developers saw it as a leap forward in code maintenance and workflow improvement.
In Apple community, when the transition from a non-declarative to a declarative approach was underway with UIKit, Apple swiftly introduced SwiftUI. However, the rapid pace of this transition left developers constrained to continue using UIKit, despite some imperfections. This frequent change in frameworks hampered community evolution, resulting in limited resources and documentation for SwiftUI adoption.
The Sample Apps
Let’s address this crucial aspect: the key to standardizing coding practices lies in studying the methods of creators.
The Android community offers numerous sample applications tailored to our needs. Google contributes by providing various sample applications, some of which are even open-sourced for production. This initiative was a significant step forward in encouraging more developers to join the platform.
Conversely, the Apple community lacks such robust activity. When seeking to learn something new, it can be incredibly frustrating to find the right sample app or the correct methodology.
How can we be certain that our approach aligns with standard practices?
For novice developers, this challenge of navigating through the lack of proper guidance or samples proves to be the most critical aspect of development.
The Learning Curve
As previously mentioned, SwiftUI and Jetpack Compose share similar syntax, architecture, and structure, both being declarative approach to solving common development challenges.
Through learning, practicing, and evolving, we refine our skills.
The learning curve is directly influenced by the amount of time invested and the existing knowledge base. For beginners, Jetpack Compose may offer a smoother learning curve due to its wealth of resources, tutorials, and sample apps compared to SwiftUI, and it also eliminates the macOS system requirement for development.
But Yeah! If you have a Mac and are interested in exploring Swift and the Apple ecosystem for development, nothing is holding you back. Swift offers a powerful and modern language for building iOS, macOS, watchOS, visionOS, and tvOS applications.
Final Thoughts
While this article couldn’t cover everything, I hope it provided a clear understanding of Android and iOS development. Whether you’re from an Android, iOS, or hybrid application background, it’s interesting to see how quickly one can adapt to a new development environment.
As Kotlin Multiplatform is rapidly gaining popularity. The goal of this article was to offer a quick overview of these frameworks, especially for developers considering cross/hybrid-platform or native approaches.
I hope you found it informative and enjoyable. Keep exploring, keep learning, and keep building better apps in the future.
It’s never too late to start a new journey of learning.